
Before You Start
- Gauge isn’t critical. Just crochet firmly, so the petals hold their shape instead of flopping. If your petals look floppy, try a hook half a size smaller.
- Leave long tails. You’ll use the tails of the flower layers, leaves and cords to sew everything together, so leave about 6 in (15 cm) whenever you fasten off.
- Make all the pieces first, then assemble. You’ll need 3 petal layers, 5–6 leaves, 2 heart charms, 2 cords and the center.
Step-by-Step Photo Guide
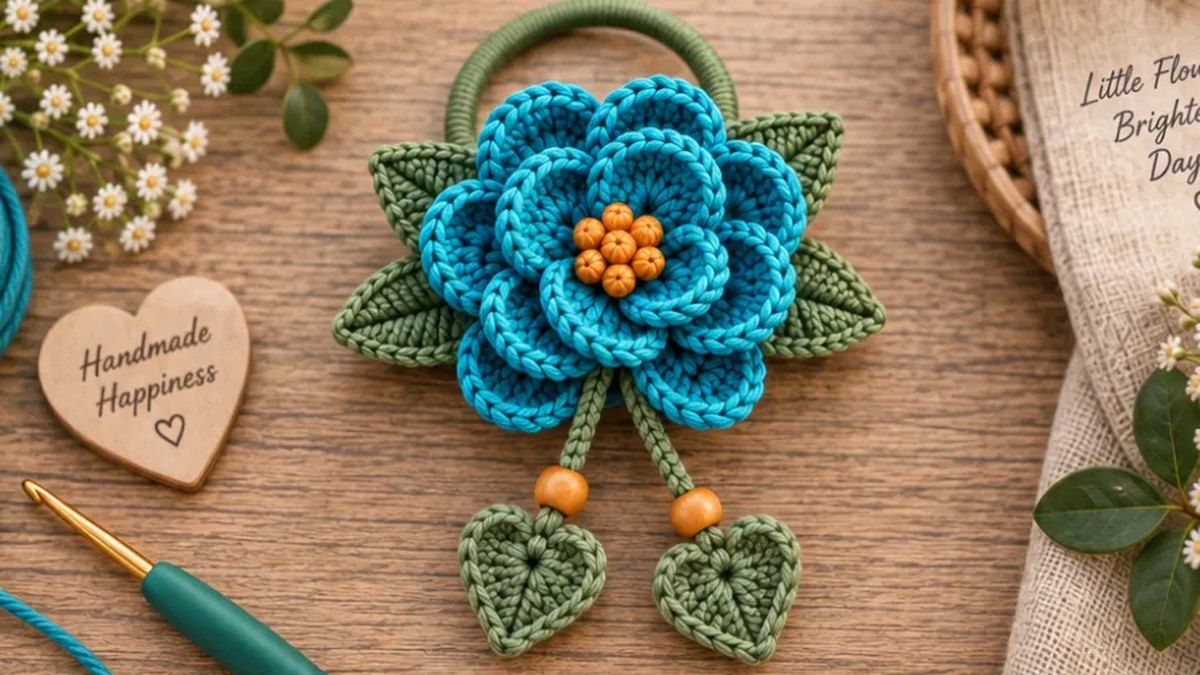
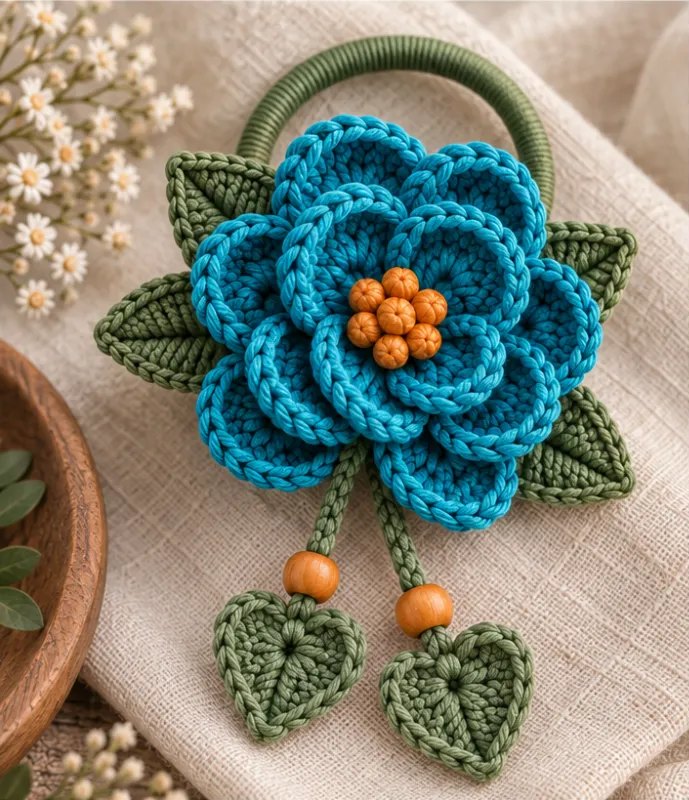
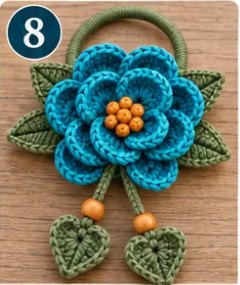
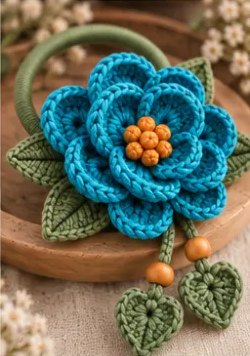
Here’s the whole project at a glance. Each step is explained in detail below.
Part 1: The Petal Layers
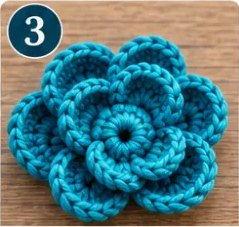
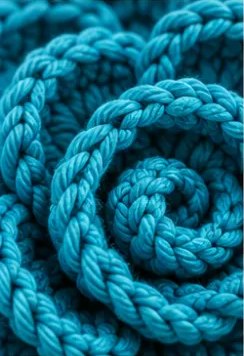
The flower is made from three separate layers, each worked into a magic ring. They get smaller as you go, and when you stack them, the petals peek out between each other like an opening rose. Use MC for all three.
Layer 1: Large Petals (Make 1)
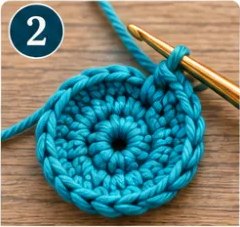
- Round 1: Make a magic ring, ch 1, 12 sc into the ring. Pull the ring closed and join with a sl st to the first sc. (12 sc)
- Round 2: *Ch 4, sk the next sc, sl st in the next sc; rep from * around. (6 ch-4 loops)
- Round 3: In each ch-4 loop work (sc, hdc, 3 dc, hdc, sc). (6 petals) Join with a sl st and fasten off, leaving a long tail.
Layer 2: Medium Petals (Make 1)
- Round 1: Make a magic ring, ch 1, 10 sc into the ring. Pull closed and join with a sl st. (10 sc)
- Round 2: *Ch 3, sk the next sc, sl st in the next sc; rep from * around. (5 ch-3 loops)
- Round 3: In each ch-3 loop work (sc, hdc, 2 dc, hdc, sc). (5 petals) Join and fasten off, leaving a long tail.
Layer 3: Small Inner Petals (Make 1)
- Round 1: Make a magic ring, ch 1, 8 sc into the ring. Pull closed and join with a sl st. (8 sc)
- Round 2: *Ch 2, sk the next sc, sl st in the next sc; rep from * around. (4 ch-2 loops)
- Round 3: In each ch-2 loop work (sc, hdc, dc, hdc, sc). (4 petals) Join and fasten off, leaving a tail.
Part 2: The Leaves
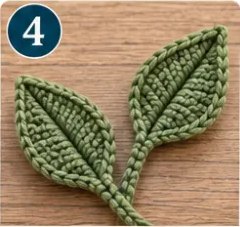
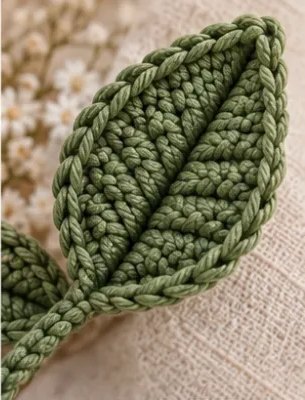
These pointed leaves are worked on both sides of a short chain, so the stitches grow taller toward the middle and shorter at the ends. With CC, leave a long tail before you start.
Large Leaves (Make 5–6)
- Foundation: Ch 12.
- First side: Starting in the 2nd ch from the hook: sc in the next 2 ch, hdc in the next 2 ch, dc in the next 4 ch, hdc in the next 2 ch, then (sc, ch 1, sl st) all in the last ch. (This makes the leaf tip.)
- Second side: Now work along the other side of the same chain: hdc in the next 2 ch, dc in the next 4 ch, hdc in the next 2 ch, sc in the last 2 ch. Sl st to the base of the leaf to join.
Fasten off, leaving a 6 in (15 cm) tail. For a leaf vein, thread the tail onto your yarn needle and work a few small straight stitches up the center from the base to the tip, then weave it in.
Part 3: The Heart Charms
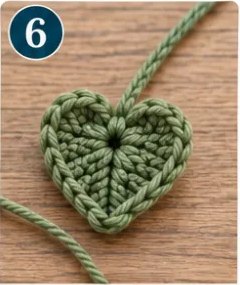
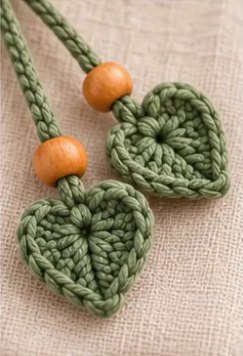
These little hearts are worked entirely into one magic ring, so they take only a few minutes each. Use CC and make 2.
- Heart: Make a magic ring. Into the ring work: ch 3, 3 tr, 3 dc, ch 1, 1 tr, ch 1, 3 dc, 3 tr, ch 3, sl st into the ring. Pull the ring closed tightly. The single tr in the middle forms the point of the heart.
Fasten off, leaving a tail for sewing. If your heart looks lopsided, gently pull the point downward and pinch the two top curves into shape.
Prefer leaves? Make small tassel leaves instead: ch 7, sc in the 2nd ch from the hook, hdc in the next ch, dc in the next 2 ch, hdc in the next ch, (sc, ch 1, sl st) in the last ch; working along the other side of the chain: hdc in the next ch, dc in the next 2 ch, hdc in the next ch, sc in the last ch, sl st to join.
Part 4: The Beaded Cords
Two sturdy cords hold the charms. Make one slightly shorter than the other so the hearts hang at different heights.
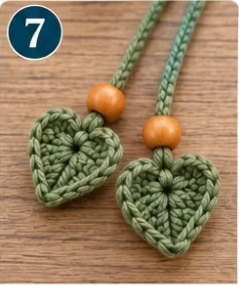
- Long cord: With CC, leave a 6 in (15 cm) tail and ch 18. Sl st in the back bump of the 2nd ch from the hook and in each ch across. (17 sl st) Fasten off, leaving another 6 in (15 cm) tail.
- Short cord: Work the same way over ch 15. (14 sl st)
Thread the bottom tail of each cord onto your yarn needle, pass it through a wooden bead and slide the bead up against the end of the cord. Then sew the tail into the top dip of a heart, going through it a few times so it’s secure. Weave in the end. Keep the top tails for attaching the cords to the flower.
Part 5: The Flower Center
You can choose between beads and a crocheted center.
Option A: Bead Cluster
With a sewing needle and thread, stitch 7–9 amber beads tightly together in the middle of Layer 3. Pass the needle back through several beads on each pass so the cluster sits firm and slightly domed. Knot the thread securely on the back. A small dab of fabric glue underneath adds extra hold.
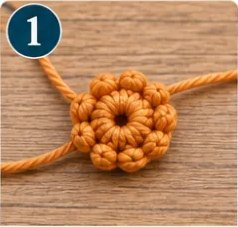
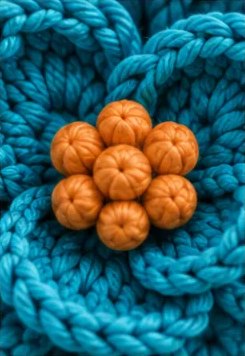
Option B: Crocheted Puff Center
With orange yarn, make a magic ring, ch 2, then *work a puff stitch into the ring (yarn over, insert the hook into the ring, yarn over and pull up a loop; repeat twice more, then yarn over and pull through all 7 loops on the hook), ch 1; rep from * 6 more times. Pull the ring tight and join with a sl st to the top of the first puff. (7 puffs) Fasten off, leaving a tail for sewing.
Part 6: Cover the Hair Tie (Optional)
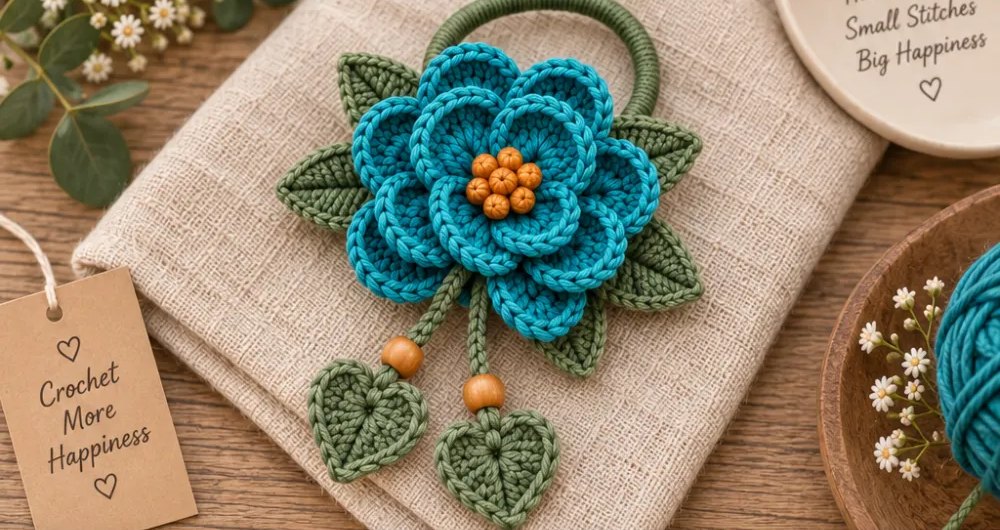
Covering the elastic in green makes the hair tie look finished from every side, just like in the photos. With CC, make a slip knot and place it on your hook. Insert the hook through the center of the elastic, yarn over and pull up a loop, then yarn over and pull through both loops on the hook. That’s one sc worked around the elastic. Keep going, pushing the stitches together as you work, until the elastic is completely covered. Join with a sl st to the first sc and fasten off.
Putting It All Together
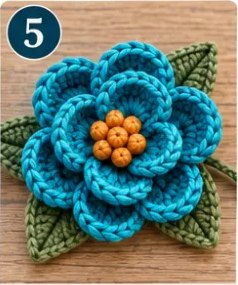
- Stack the petals. Lay Layer 1 right side up. Place Layer 2 on top and turn it slightly so its petals sit between the gaps below. Using the tails, stitch through both centers a few times. Add Layer 3 the same way.
- Add the leaves. Arrange the leaves in a ring behind the flower so their tips show past the outer petals. Whip stitch the base of each leaf to the back of Layer 1.
- Add the center. Sew the bead cluster or puff center to the middle of Layer 3, covering the stitches that join the layers.
- Attach the charms. Sew the top tails of both cords to the back of the flower, near the lower edge, so they hang down between two leaves.
- Attach the hair tie. Turn the flower over and lay the hair tie across the back. Stitch around the elastic and through the back of Layer 1 several times. This join takes the most strain when you wear it, so make it strong.
- Finish. Weave in any remaining ends. To relax the petals into a soft curve, hold a steam iron a few inches above them for a moment, without pressing.
How to Wear It
Slip the hair tie around a low bun or the base of a ponytail, with the flower at the front and the heart charms hanging down. It also looks lovely looped around the handle of a handmade bag, or given as a little gift tied onto a present.
Make It Your Own
- New colors: Try blush, ivory or deep burgundy petals, and keep the leaves green for contrast.
- Fuller flower: Make two large layers (Layer 1) instead of grading down in size.
- No beads? A cluster of French knots in a contrasting color makes a pretty center.
- Clip instead of tie: Sew the finished flower onto an alligator clip or a French barrette.
Care and Safety
Hand wash gently in cool water, press out the water in a towel and let the flower dry flat, reshaping the petals while it’s damp. Because this accessory has small beads, please keep it away from babies and young children, who could swallow them. For little ones, choose the crocheted puff center and leave off the beaded cords.